
Camera setupArlo Essential Pan Tilt Security How to VideoOfficial Arlo how-to video 01
Official Arlo setup videos, app walkthroughs, camera-model support and the complete searchable FAQ library—all in one place.
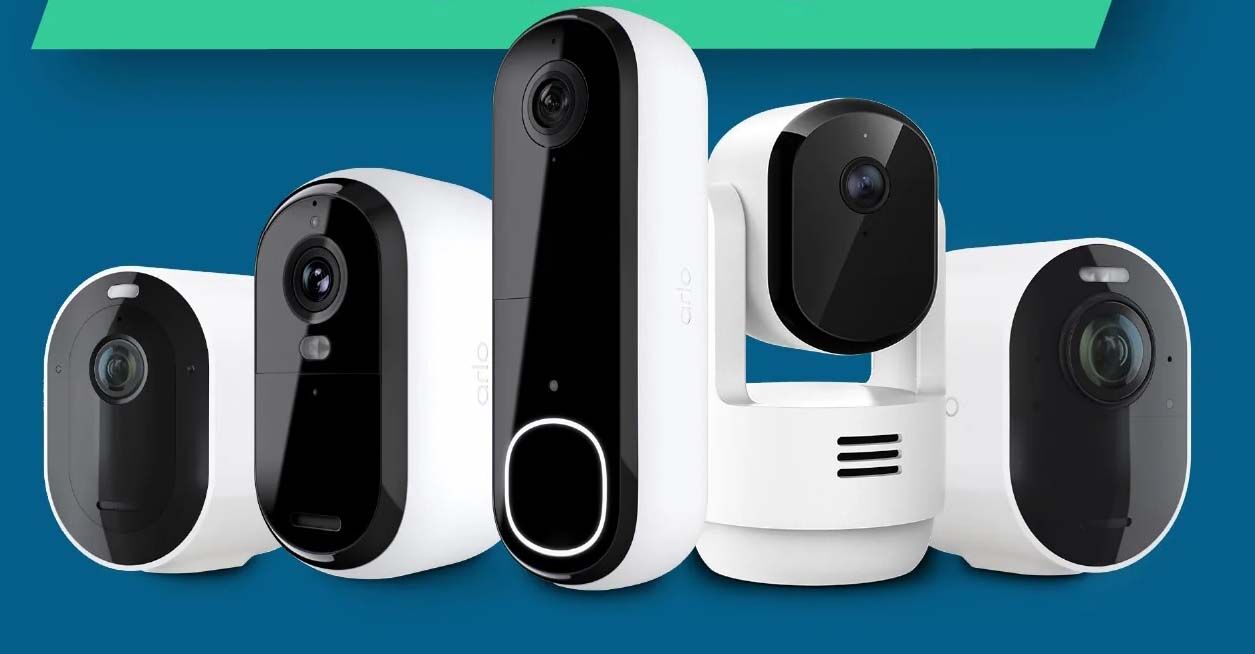
For faults, warranty assistance, replacement parts or direct manufacturer support, contact Arlo Australia.
Jump directly to the information you need, then use the search and category controls to narrow the FAQ list.
All previous videos have been replaced with the latest guides supplied for this page. Press play to load a video only when you need it.
Current setup guides for Essential, Pro, indoor, pan-tilt and wired floodlight products.
Learn the updated Arlo Secure app, connect Alexa, and configure modes, schedules, routines and automations.
Additional guidance for Ultra 2 installation, AI recognition, emergency response and custom smart detection.
Choose your camera model to open the matching setup video. The original Arlo product-support pictures supplied for each model are retained.
Setup guidance for Arlo Pro and Pro XL Security Cameras, 6th Gen.
Product setup support for the Arlo Ultra Security Camera, 3rd Gen.
Setup help for the outdoor Essential Pan Tilt Security Camera.
Setup help for the plug-in Essential Pan Tilt Indoor Camera.
Setup support for Essential and Essential XL Security Cameras, 3rd Gen.
Setup video and dedicated FAQ reference for the Arlo Go 2 LTE / Wi-Fi Security Camera.
Search the full page or filter by topic. Open only the answers you need, or expand everything for detailed reading.
Use the following article for tips on how to increase the range of your Arlo system
Using your Arlo system with a range extender or a Powerline adapter offers you flexibility when deciding where to place your Arlo Wire-Free or Arlo Q system.
Instead of connecting the Arlo SmartHub or Arlo base station directly to your router, you can connect the base station to an Ethernet port on a WiFi range extender or Powerline adapter. This means you can put the base station farther away from the router or in a central location in your home to get better coverage with your Arlo cameras.
For Arlo Q, you can connect it to a WiFi range extender. This means you can put the Arlo Q farther away from the router.
Range extenders work as a WiFi bridge by connecting wirelessly to routers. You can use the Ethernet port on the extender to connect the Arlo base station and other devices to your home network.
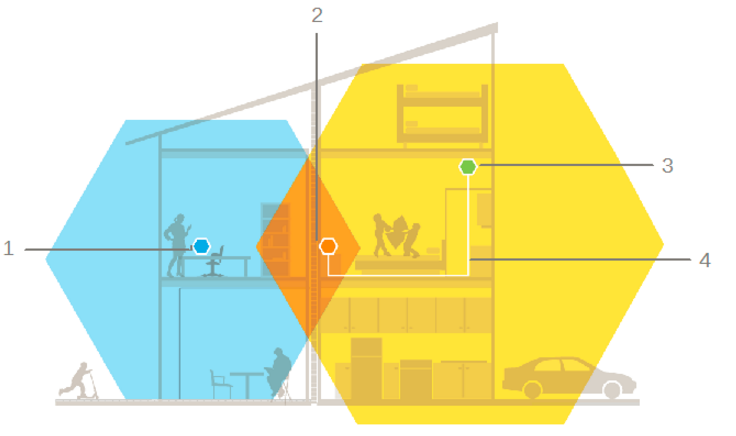
Powerline adapters extend your network using your existing electrical wiring. Plug two or more Powerline adapters into electrical outlets to create a wired network connection. You can connect an Arlo SmartHub or Arlo base station to the Powerline adapter using an Ethernet cable.
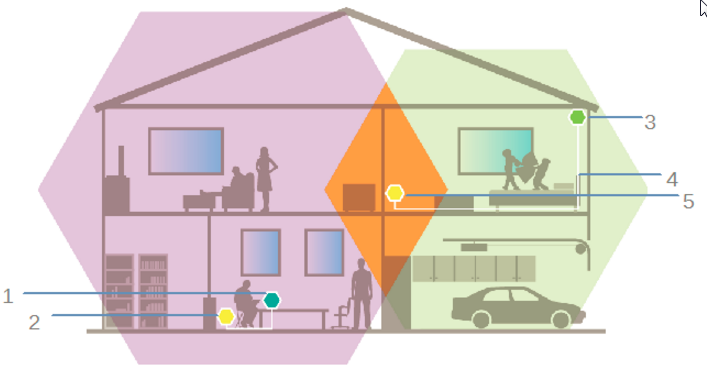
To extend the range of an Arlo Wire-Free camera system with a WiFi range extender or Powerline Adapter:
To extend the range of an Arlo Q camera system with a WiFi range extender:

Sound detection. If this icon is light gray, sound detection is disabled in the camera's currently selected mode. If the icon is black, sound detection is enabled. If the icon is orange, the camera is currently detecting sound.

Motion detection. If this icon is light gray, motion detection is disabled in the camera's currently selected mode. If the icon is black, motion detection is enabled. If the icon is orange, the camera is currently detecting motion.
WiFi signal strength. Shows the signal strength for the WiFi connection between the base station and the camera.

USB device. If this icon is showing, a USB storage device is connected. If the icon is orange, the storage on the USB device is almost full.

SD card. If this icon is showing, an SD or microSD card is connected. If the icon is orange, the storage on the SD or microSD card is almost full.

Battery. Shows an estimate of your battery charge.

Play button. Tap or click to view a live feed.

Recordings. Tap or click to view recordings.

Play button. Tap or click to view a live feed.

Stop. Tap or click to stop a live feed.

Volume. Tap or click to adjust the volume on your camera.

Push to talk. Tap or click and hold to speak to someone through your Arlo camera.

Record. Tap or click to record a live feed.
Snapshot. Tap or click to take a picture of a live feed.

Spotlight. Tap or click to activate an Arlo Light or the spotlight on your camera. Not all cameras have an integrated spotlight.

Expand. Tap or click to view a live feed in full screen.

Minimize. Tap or click to exit a full-screen recording.

Pencil (Edit). Tap or click to edit rules and names of cameras.

Settings. Tap or click to access the device settings of a camera.

Add. Tap or click to add a new device or other option.

Emergency. Tap or click to activate Siren, Call a Friend, or Call e911.

Learn more. Tap or click to learn more about a feature or camera.

Ethernet connection. This icon displays when your base station or SmartHub is connected to Ethernet.
To view your battery level:
Camera battery levels are accurate as long as the camera is close to room temperature (65-75°F, 18-24°C). Temperature variations can affect the accuracy of the displayed battery level. The battery level is less accurate under the following conditions:
You receive a low battery notification when batteries have 15% of their charge remaining.
The following table shows how much charge is left based on the battery icon shown in your Devices feed.
|
Battery Icon |
Battery Level |
 |
76%-100% |
 |
51%-75% |
 |
26%-50% |
 |
1%-25% |
 |
0% |
Note: If your camera or base station is offline, the battery icon is hidden.
If your battery-powered camera is plugged in, the following icons display instead:
|
Battery Icon |
Meaning |
 |
Battery is charging |
 |
Battery is fully charged |
 |
Charging is disabled |
If you see the charging disabled icon, check for the following conditions:
If you don’t have an Arlo Smart subscription, Arlo supports five cameras. However, if you purchase one of the following kits, the service plan supports six cameras:
Note: The service plans that support six cameras apply only to customers who live in the United States or Canada.
If you purchase an Arlo Ultra camera kit, an Arlo Smart subscription might be included, depending on your country or region.
Arlo Smart makes camera notifications more intelligent and meaningful. Read this article to learn what Arlo Smart has to offer.
Enhance your security experience with Arlo Smart, and we’ll send you a notification so that you can take quick action, such as phone a friend, sound an alarm, or call emergency services.
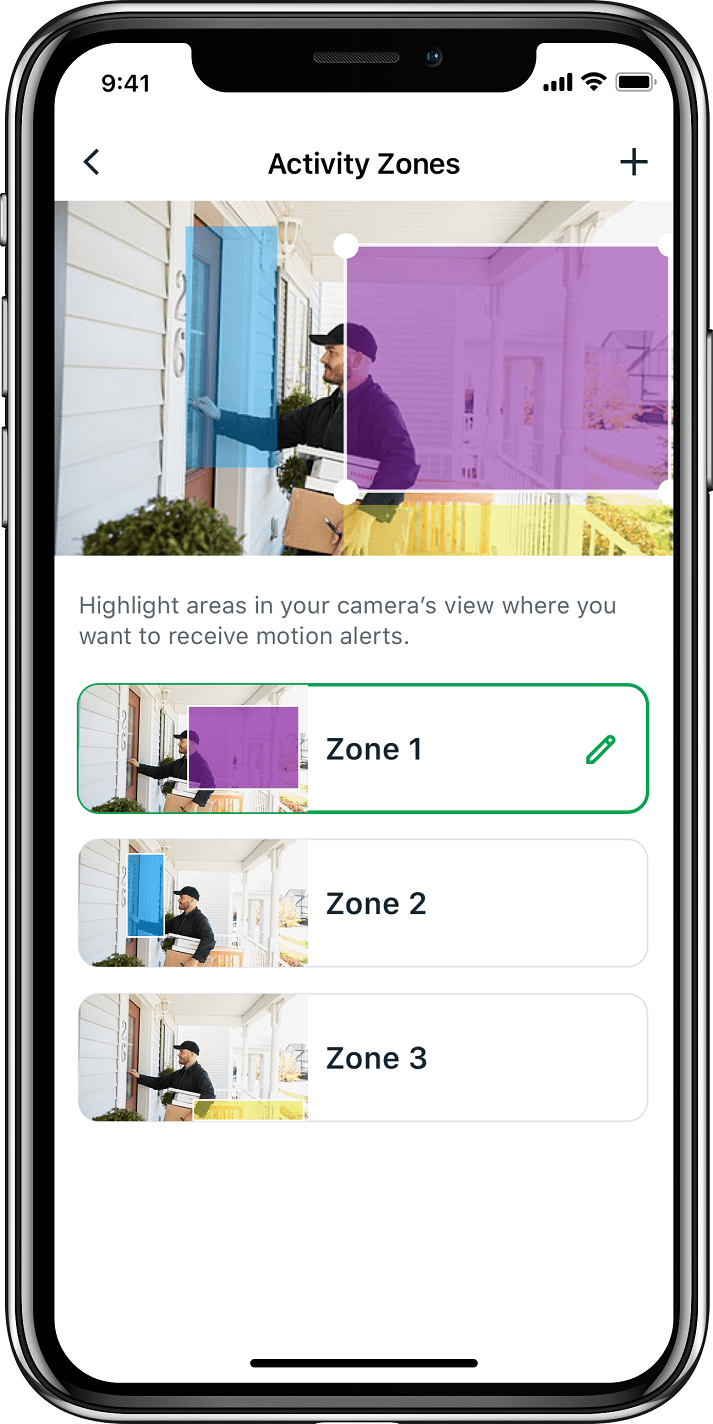
Create custom activity zones to focus on important areas like your front door or driveway, and receive alerts when something happens.
Enable Arlo Smart Object Detection, and your cameras can tell the difference between a person, animal, vehicle, or package.
Using Arlo Smart
Before using Arlo Smart, you must have an Arlo Smart subscription.
Learn more about the exciting Arlo Smart feature offering:
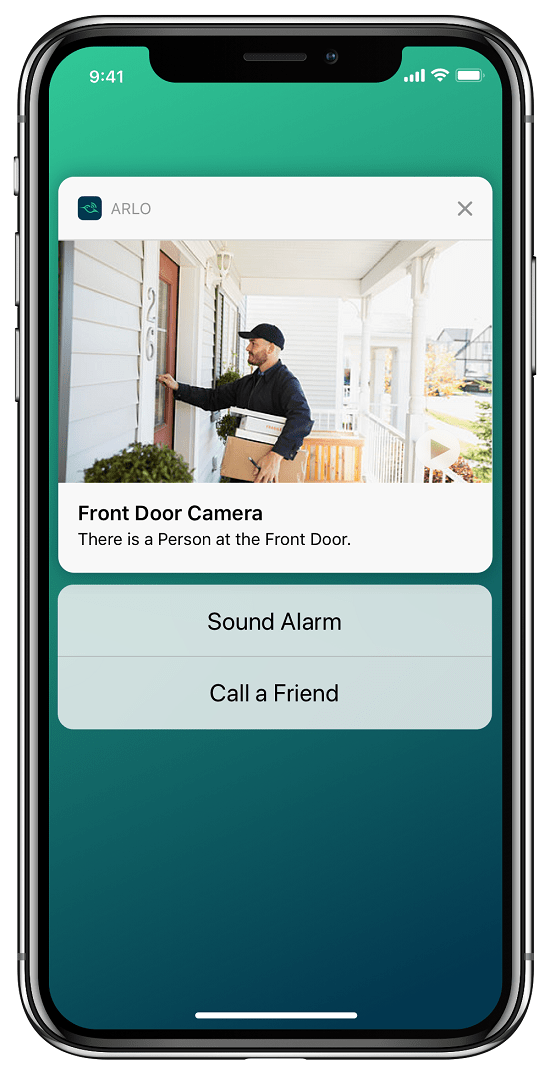
Modes and rules let you tell your Arlo system what to do in different situations. For example, you can set your Arlo system to record a 30-second video when the motion sensor is activated on a specific camera and alert you via email.
Modes let you tell your Arlo cameras to respond differently at different times. For example, you probably don't want to receive an alert about motion in the living room while you're doing yoga in the living room. You might want to turn on a different mode when you're away on vacation than when you're just out at the store for an hour. Arlo modes give you complete control over how your cameras respond to motion or sound.
You can create your own modes, but certain modes are available automatically:
If you choose to create your own modes, you can do so by creating a rule or rules that tell your cameras what to do while that mode is active. You can also choose to edit an existing mode.
Each mode consists of one or more rules that provide detailed instructions for your Arlo system. For each mode, you can set the following options:
Arlo battery-powered cameras are not intended for continuous recording. The batteries in your Arlo Pro or Arlo Wire-Free camera last for about four to six months with normal usage, which is about five minutes of recordings a day. The batteries in your Arlo Go camera last for about two to three months with normal usage, which is about five minutes of recordings a day.
Use these tips to maximize your camera's battery life:
These environmental factors can shorten battery life:
To purchase replacement batteries for your Arlo cameras:
Auto Zoom and Tracking is a feature that enables your Arlo camera to digitally zoom in on a moving object and follow it. This can help you see people, vehicles, and other moving objects without needing to manually zoom in.
With Auto Zoom and Tracking and motion detection activated, your Arlo camera zooms in to objects and tracks their movement while the object is within the camera’s field of view. You can also manually zoom in to a live stream and view a crystal-clear image of the object. Your Arlo camera uses its advanced image sensor to enhance the image quality of the zoomed-in area.
 Note: When Auto Zoom and Tracking is on, the zoomed-in image might not be in full video resolution because Arlo digitally zooms in on the image.
You need the following to use Auto Zoom and Tracking:
When you set up Auto Zoom and Tracking, make sure your cameras are in an outside and open environment. Auto Zoom and Tracking is meant for areas with a wide field of view, so avoid narrow places like the front doorway and indoor areas.
To activate Auto Zoom and Tracking:
To manually enhance your live stream image:
To ensure that your library includes motion detection recordings, check that Auto Zoom and Tracking is activated. When Auto Zoom and Tracking is activated, your Arlo camera automatically zooms in and tracks the motion for a curated clip. To access Auto Zoom and Tracking clips, simply check your library in the Arlo app or website.
 in the Arlo app while your Arlo camera is connected to the Arlo Solar Panel, your camera is not registering the Arlo Solar Panel as a compatible power source. If you see this icon, or if the solar panel does not charge your Arlo camera battery, follow the troubleshooting steps below.
Recharge your Arlo camera before using it with the Arlo Solar Panel. The Arlo Solar Panel is meant to keep your camera charged, not to charge it from low to full battery.
To troubleshoot problems with your Arlo Solar Panel:
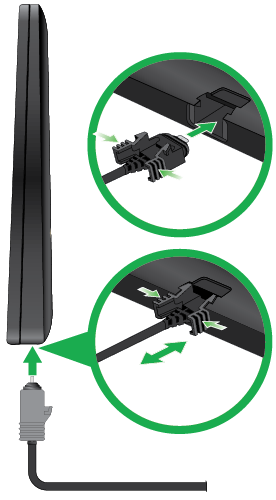
If your camera battery is at 25% capacity or less, recording delays might occur when your camera detects motion. The battery icon in the Devices tab turns yellow when your camera battery drops to 25% capacity.
Mount your Arlo camera at least 7 feet (2.1 meters) above the floor or ground, angle it slightly downward, and place it within 10-15 feet (3.0-4.6 meters) of where motion is expected.
Make sure that side-to-side traffic crosses the camera's field of view. The camera's motion sensor is more sensitive to side-to-side movement across its field of view than to movement directly toward or away from the camera. The best area for motion detection is 5 to 20 feet (1.5 to 6 meters) from the camera position.
If an Arlo wire-free camera's signal to the base station is weak, recording delays might occur when motion is detected.
To test whether the camera signal is strong enough, check the camera LED on the base station; if it's blinking amber, the base station detects a low data rate, which means that a camera is too far from the base station.
Follow these tips to increase signal strength:
If an Arlo Go camera's connection to the mobile network is weak, recording delays might occur when motion is detected. If your Arlo Go camera regularly has fewer than three bars of mobile signal strength, move your camera to a location with better signal strength.
If you still experience motion detection delays after following these tips, consider cross-recording. With cross-recording, you can create a rule that triggers a recording on one camera when a different camera detects motion. For example, you can configure the camera at your front door to record a 60-second video when the camera in your garage detects motion.
The Auto Zoom and Tracking and Local 4K Live Streaming settings cannot be activated on your Arlo Ultra camera at the same time. This is because certain features are specifically optimized for each setting. Refer to the sections below for information about what you get when you have the two settings on or off.
Auto Zoom and Tracking is off and Local 4K Live Streaming is on:
Without an Arlo Smart subscription, you can:
With an Arlo Smart subscription, you can:
With an Arlo Smart subscription and a Premium Video Recording (PVR) add on, you can:
Auto Zoom and Tracking is on and Local 4K Live Streaming is off:
Without an Arlo Smart subscription, you can:
With an Arlo Smart subscription, you can:
With an Arlo Smart subscription and a Premium Video Recording (PVR) add on, you can:
Auto Zoom and Tracking and Local 4K Live Streaming are off:
Without an Arlo Smart subscription, you can:
With an Arlo Smart subscription, you can:
With an Arlo Smart subscription and a Premium Video Recording (PVR) add on, you can:
An activity zone focuses motion detection on a specific area. You can create up to three zones for each Arlo Ultra, Pro 3, Pro 2, Q, Q Plus, or Baby camera. By default, motion detection observes the entire camera frame.
Your camera must be plugged in to a power source to use activity zones. You must subscribe to Arlo Smart to use activity zones without plugging in your camera.
To create an activity zone with the Arlo Ultra camera,
To create activity zones:
Cloud Activity Zones are an Arlo Smart feature. They allow you to create activity zones on Arlo wire-free cameras that aren’t connected to power. Regular activity zones require a connection to a power source.
Note: When motion is detected, your camera sends video to the cloud for processing to determine if motion occurred in the Cloud Activity Zones that you created. When your camera is operating on battery power, you might notice your battery depleting more than usual even though you don’t have many of recordings in your library.
To set up activity zones:
Activity zones allow you to designate areas in your camera’s field of view where you want your camera to detect and record motion. When your Arlo Ultra detects motion, it determines if motion occurred in the activity zone(s) that you created. If so, the Arlo app notifies you, and the recording is uploaded to your video Library.
Arlo Ultra differs from earlier Arlo cameras in two ways. Now you can:
To create an activity zone with Arlo Ultra:
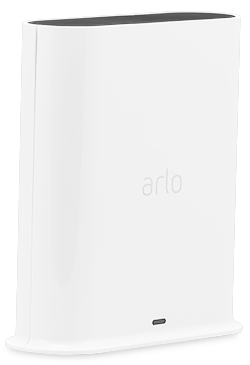
Arlo SmartHub
The Arlo SmartHubs offer the best Arlo experience and are compatible with all Arlo wire-free devices, except Arlo Go.
An Arlo Smart subscription enables you to record in 2K or 4K video resolution, activate advanced object detection, create cloud activity zones, and much more. You can purchase a plan for multiple cameras, a single camera, or both. This provides a flexible and customizable experience for your Arlo system.
Arlo Wire-Free, Pro, Pro 2, Go, Q, Q Plus, and Arlo Baby cameras all include 7-days of free cloud recording.
Arlo Ultra and Pro 3 kits currently come with an Arlo Smart trial. When the trial expires, you have the option to sign up for an Arlo Smart plan. You can also choose not to have a service plan.
Note: Some Arlo kits might have different service bundles included for variable amounts of time.
With an Arlo Smart Premier subscription, you can record to the Arlo cloud with up to 2K video resolution on 1 camera or 5 cameras. Your clips save to the Arlo library for up to 30 days after recording. If you have more than 5 cameras, you can add a single-camera plan for each additional camera at half the original price.
You must use the Arlo Android app or log in to your Arlo account on a computer to change or cancel your Arlo subscription plan. Arlo support experts and community moderators are not able to cancel your service, change your service, or provide a refund for the unused portion of your subscription.
Note: If you have a legacy Arlo Smart plan, you can’t make changes to your plan unless you switch to a new Arlo Smart plan.
When you change or cancel your plan:
To change your Arlo subscription plan:
To cancel your Arlo subscription plan:
When the Arlo Smart trial that was included with your Arlo Pro 3 camera ends, you have the option to sign up for an Arlo Smart plan. You can also choose not to have a service plan.
Without a service plan, your Arlo Pro 3 camera will continue to have the following features:
See below for a details about what you get with each subscription plan.
|
No Subscription |
No Subscription |
Arlo Smart |
Arlo Smart Premier |
Arlo Smart Elite |
Premium Video Recording Add-on |
Continuous Video Recording (CVR) Add-on |
|
|
Number of cameras supported |
5 |
5 |
Per-camera plan |
10 |
20 |
Per-camera upgrade |
Per camera upgrade |
|
Cloud recording (up to 1080p) |
No |
Rolling 7 days |
Rolling 30 days |
Rolling 30 days |
Rolling 60 days |
n/a |
24x7 14 day or 30 day |
|
4K cloud recording |
No |
No |
No |
No |
No |
Yes |
n/a |
|
Person, Vehicle, Animal, and Package Detection |
No |
No |
Yes |
Yes |
Yes |
n/a |
n/a |
|
Live streaming |
Yes |
Yes |
Yes |
Yes |
Yes |
n/a |
n/a |
|
Two-way audio |
Yes |
Yes* |
Yes |
Yes |
Yes |
n/a |
n/a |
|
Push notifications |
Yes |
Yes |
Yes |
Yes |
Yes |
n/a |
n/a |
|
Local recoding (requires USB drive) |
Yes |
Yes |
Yes |
Yes |
Yes |
n/a |
n/a |
|
Amazon Alexa, Google Home, IFTTT and other third-party smart home integrations |
Yes |
Yes |
Yes |
Yes |
Yes |
n/a |
n/a |
|
Buy service for just 1 or 2 cameras at a per camera rate |
Buy service for all the cameras on your account |
Buy service for all the cameras on your account |
Upgrade any service plan with higher quality recording (4K) |
Add 24x7 recording to cameras with AC power options |
*The original Arlo Wire-Free camera does not have two-way audio.
When the Arlo Smart 1-year trial that was included with your Arlo camera purchase ends, you have the option to purchase an Arlo Smart Premier or Elite plan. You can also choose not to have a service plan.
Without a service plan, your Arlo camera will continue to have the following features:
If you own legacy Arlo cameras (Pro 2, Pro, Wire-Free, Go, Q Plus, Q, and Baby), they will revert back to No Subscription, which includes rolling 7-day cloud recording, along with all the same features and benefits as before.
We recently made changes to the Arlo Smart subscription plans. You can now purchase a multi-camera or single-camera version of Arlo Smart Premier or Arlo Smart Elite. Both plans include advanced object detection, cloud activity zones, rich push notifications, and more. Arlo Smart Premier enables recording in 2K video quality, while Arlo Smart Elite enables recording in 4K video quality, eliminating the need to purchase a separate premium video recording (PVR) plan and providing a more flexible and customizable experience.
Direct Storage Access is the perfect solution if you’re looking for a convenient way to access videos stored locally on your Arlo SmartHub. Instead of removing the microSD card or USB storage device and plugging it into your computer to view recordings, Direct Storage Access enables a fast way to directly view recordings through the Arlo App at the full resolution of your Ultra or Pro camera. When you use Direct Storage Access, your Arlo recordings never touch the Arlo cloud, providing seamless point-to-point access.
To set up Direct Storage Access, you need the following:
To setup Direct Storage Access for your Arlo system, you must first insert a compatible USB or microSD device into your Arlo SmartHub.
After you have inserted a compatible storage device, you must enable local storage recording in the Arlo app. When local storage recording is enabled, you can setup Direct Storage Access.
To enable Direct Storage Access:
After you enable Direct Storage Access, your recordings are accessible when you are on the same LAN as the SmartHub. To access recordings when outside the LAN, we recommend enabling VPN on your router and mobile device to establish a secure connection to your SmartHub. Please consult your router manufacturer for specific configuration details.
You can also enable port forwarding as an alternative to using a secure VPN to access your storage recordings in the Arlo app.
Note: To enable port forwarding, you might need to contact your Internet service provider (ISP) to request permission for traffic to be allowed through the external port that is defined by the Arlo app.
To enable or disable port forwarding after Direct Storage Access is enabled:
Disabling Direct Storage Access or port forwarding deactivates Direct Storage Access for your Arlo SmartHub, but your router settings will remain unchanged. If you deactivate port forwarding in the Arlo app, remember to also remove those ports from the port forwarding section of your router settings.
When Direct Storage Access is enabled, your Arlo recordings appear in the Library page of the Arlo app. Your recordings do not contain a thumbnail if they are not saved to the Arlo cloud.
Note: You can’t manually record or capture a snapshot to a local storage device. Manual recording and snapshots are only available when you record to the cloud. You also can’t delete specific recordings from your SmartHub through Direct Storage Access. Deleting recordings must be done by connecting the USB or microSD device to a PC or Mac.
To access your Direct Storage Access recordings:
All wire-free cameras can record to local storage, even if your Internet goes down. Arlo Pro 2, Pro, and Wire-Free cameras always have 7 days of free rolling cloud storage.
Important reminders:
Required hardware:
To set up local backup storage on an Arlo base station:
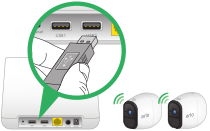
Note: If you want a second USB device for when your first USB device is full, you can follow the same steps to add a second USB device, but you can only enable one USB device at a time.
All Arlo video recordings can be stored to the cloud, but you can connect a USB device to your Arlo base station or SmartHub for a second location to store recordings locally.
Note: Only automatically triggered recordings are saved locally to the connected USB device. Manual recordings are only saved to the cloud.
To view videos saved on a local storage USB device, you must remove the USB device from the base station. Cloud recording is still enabled, but if you do not want to interrupt USB recording while you view videos, set up a second USB device for USB recording.
To view videos saved on a local storage USB device:
All Arlo video recordings are stored to the cloud, but you can connect a USB device to the Arlo Pro base station and use the USB device as a second location to store Arlo Pro and Arlo Wire-Free recordings locally. Local storage to a USB device cannot be used on its own as a substitute for cloud recording.
Note: Only automatically triggered recordings are saved locally to the connected USB device. Manual recordings are only saved to the cloud.
To enable local storage backups on a different USB device:
To disable local storage recording:
All Arlo video recordings are stored to the cloud, but you can connect an SD card to your Arlo Go or Arlo Q Plus camera and use the SD card as a second location to store Arlo recordings locally. Local storage to an SD card cannot be used on its own as a substitute for cloud recording.
To view videos saved on a local storage SD card, you must remove the SD card from your Arlo Go or Arlo Q Plus camera. Always eject SD cards safely in your camera's settings, as described in this article. After you eject an SD card, cloud recording is still enabled, but SD card recording is disabled as soon as you remove the SD card.
To view the files on your SD card, you need an SD card reader, often called a memory card reader. Most computers do not come equipped with an SD card reader, but many inexpensive readers are available with standard USB or Micro USB connectors. If you purchase an SD card reader, make sure that you choose one that can read Micro SD cards.
To view videos saved on a local storage SD card:
All Arlo video recordings can be stored to the cloud, but you can connect a USB device to your Arlo base station or SmartHub and use the USB device as a second location to store recordings locally.
To delete all files on your USB deviceand format it for local storage using an Arlo base station or the SmartHub:
Note: Always eject USB devices using the Safely Eject USB Device button.
With Arlo Ultra and a compatible SmartHub or base station, you can save 4K videos directly to a microSD card or USB device. This provides a solution if you don’t want your Arlo video recordings to touch the Arlo cloud, or in the event that your Arlo SmartHub or base station disconnects from the Internet.
You need the following to record locally in 4K:
All Arlo video recordings are stored to the cloud, but you can connect a Micro SD card to your Arlo Go camera and use the Micro SD card as a second location to store Arlo Go recordings locally. Local storage on a Micro SD card cannot be used on its own as a substitute for cloud recording.
If you connect a Micro SD card, the camera records to both the cloud and the Micro SD card. If the camera is powered on but its LTE connection drops, the camera continues to record to the Micro SD card. Micro SD card recordings made while your camera is not connected to the cloud are not uploaded to the cloud.
To view Micro SD card recordings, you must remove the Micro SD card from your Arlo Go camera and view them on a computer with an Micro SD card reader.
The Arlo app notifies you if the Micro SD card is low on storage space or is full. If you select automatic overwrite, the oldest recordings are automatically deleted when available storage on the Micro SD card is below 20%. Unrelated files that are not in the Micro SD card’s Arlo folder are not deleted by automatic overwrite.
Required hardware:
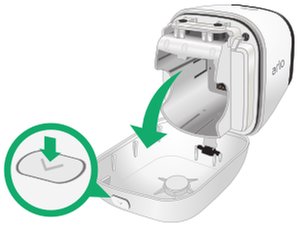
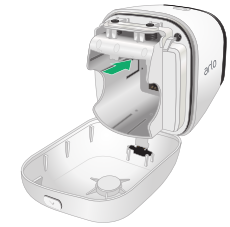
To set up local backup storage on an Arlo Go camera:
Average battery life for an Arlo Go camera is more than one month (depending on mobile signal strength), and average data usage is 850 MB (0.85 GB) per month.
Average use assumes that you are using Optimized or Best Battery Life video settings and that your cameras record for approximately five minutes per day.
Increasing the length or quantity of video recordings in your camera's modes and rules increases your data usage and decreases your battery life. Using a higher-quality video setting also increases data usage.
The following environmental factors can also reduce battery life:
The Arlo Chime LED lights up to indicate the chime status and activity.
Fading white. Your Arlo Chime is ready to be set up.
Slow blinking white. Your Arlo Chime is applying new settings.
Quickly flashing white. Your Arlo Chime is successfully set up.
Pulsing amber. A set up error occurred
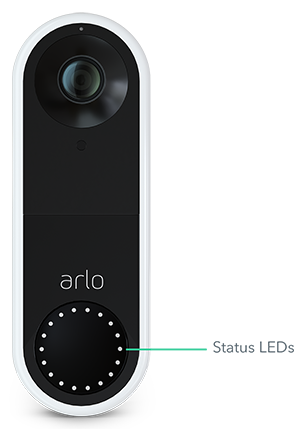
If the LED on your Arlo Video Doorbell is off for more than a minute, your doorbell is not receiving power.
To troubleshoot your Arlo Video Doorbell when the LED is off:
If you have checked all these troubleshooting options, and the doorbell LED is still off, consult an electrician to confirm whether your home is compatible with Arlo Video Doorbell.
For manufacturer troubleshooting, warranty assistance and replacement parts, speak directly with Arlo Australia support.